Wednesday, September 20, 2006

Yummy Gulaman

My favorite desserts made by my mother are refrigerator cake, chocolate leche flan (custard) and gulaman. I could not find Mama's recipe book. These were recipes written on the white spaces on a manual of some kitchen appliance. I remember the ingredients she used but I cannot recall the proportions. Ma's gulaman required egg yolks and we do not throw the egg whites because we use that to create the chocolate leche flan. Thanks to the internet, I can always try similar recipes. I found a very easy gulaman recipe that does not require eggs. It's so simple and quick. I must give credit to this blog for the recipe. Thanks, Toni!

Gulaman or agar is made out seaweeds. These are usually sold in dried bars. This is also used as culture medium for laboratory work. The bars are dissolved in water and left for several minutes to set into a jelly. Powdered gelatin may probably be substituted for this recipe but I do not know the proportions.

Ingredients:
1 bar gulaman
2 1/2 cups water
1 can condensed milk (301 ml)

Procedure:
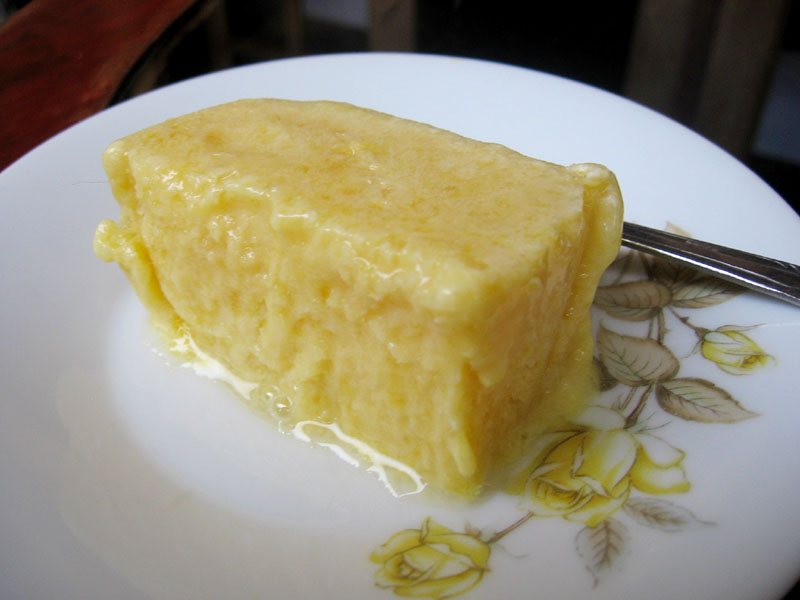
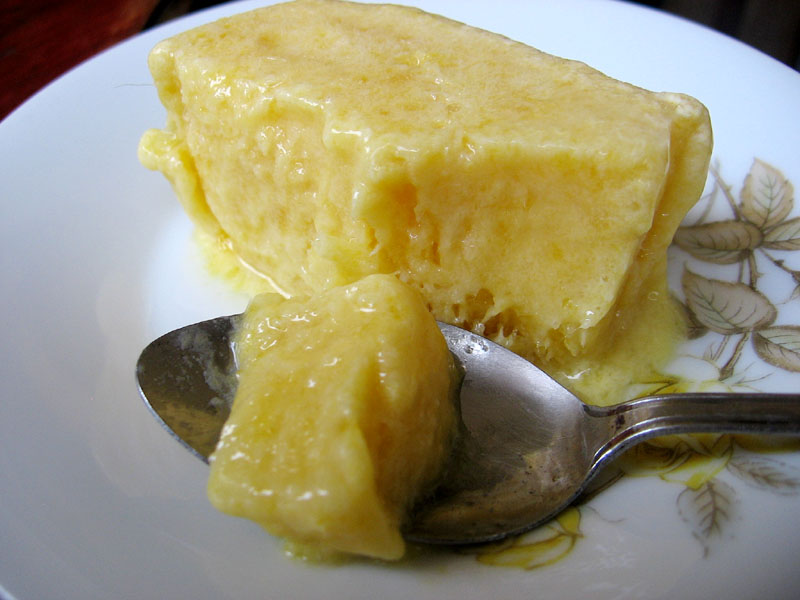
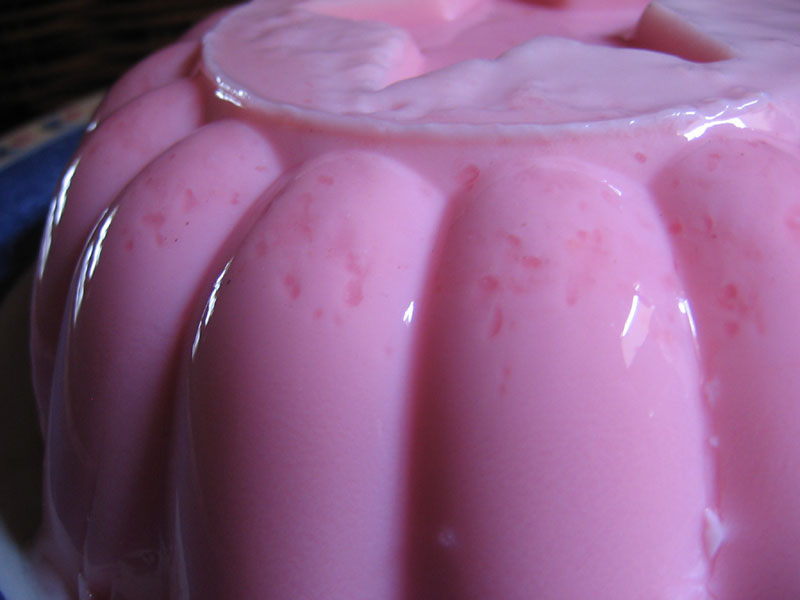
Tear gulaman into strips. Soak it in water. Boil gulaman-water mixture until gulaman is dissolved. Remove from heat. Prepare bowl with condensed milk. Pour gulaman over condensed milk. Mix well. Strain mixture over the mold. Chill for several hours before releasing it from the mold.


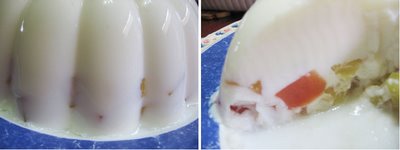
Folks at home loved this. It has the right sweetness. This was a winner for us. Everybody loved it. I am a purist. I love this in its simplest form but I got a request from my aunt to mix it with fruit cocktail. I had a different experience with that. The fruits tend to float in the mixture that when it was released from the mold, all the fruits are in the bottom. I researched on the internet. The trick was to incorporate the fruits when the gulaman is half set so that it will be able to hold the fruits.

Labels: ,

Tuesday, September 19, 2006

Paul Anka: Rock Swings!

Paul Anka is already a celebrity in our house long before I got hold of this new album. I grew up listening to 'Diana', 'Lonely Boy' and several other songs. No, I did not grow up in the 60's. I am an 80's child but my Sunday afternoons are spent on trips to 60's music lane. My father would crank up his music collections on Sundays. Back then, my parents would picture him as this handsome singer with shrieking female fans. Fast forward to the new millennium, he has this DVD which was recorded from his concert in Las Vegas. I saw a balding old man with the classic groove. Nothing new. I need to watch the DVD several times over to appreciate the performance. I learned that this guy wrote 'My Way'. Yes! It is that Frank Sinatra song which one should not sing in karaoke bars lest be shot to death for bastardizing the song.

Recently, I got to listen to the "Paul Anka: Rock Swings" album. I did not expect too much from this album. Needless to say, I was extremely pleased. The album contains his versions of some rock hits like Oasis "Wonderwall', Bon Jovi's "It's My Life" and Soundgarden's "Blackhole Sun". It is a wonder why this man, who composed gazillion songs, would do covers for other artists. Once you listen to this album you will realize that his musicality still shines through nonetheless. The arrangers should also be commended for the way the music turned out. I love the way the brass band swinged it. It rockingly swings good. This is fun music! This is ideal for parties where there’s a mixture of age groups. The younger generation would enjoy this because they recognize the songs and the older ones will enjoy because it is Paul Anka. In my case, I can now understand the lyrics to Nivana's "Smells like Teen Spirit" and this is one of my favorites in this album.

Below is the list of tracks:
1. It`s My Life (Bon Jovi)
2. True (Spandau Ballet)
3. Eye Of The Tiger (Survivor)
4. Everybody Hurts (REM)
5. Wonderwall (Oasis)
6. Blackhole Sun (Soundgarden)
7. It`s A Sin (Pet Shop Boys)
8. Jump (Van Halen)
9. Smells Like Teen Spirit (Nirvana)
10. Hello (Lionel Richie)
11. Eyes Without A Face (Billy Idol)
12. Lovecats (The Cure)
13. Way You Make Me Feel (Michael Jackson)
14. Tears In Heaven (Eric Clapton)

GO ahead! Buy yourself a copy. I know you want to. ;-)

Monday, September 18, 2006

The Chicken Adobo Debut on Martha

I was flipping channels last Friday and I stumbled upon a cooking demo on making chicken adobo hosted by no other than Martha Stewart! The guest was a chef who owns a successful Filipino restaurant in New York. They have a different way of cooking the adobo. They baked the chicken after cooking it on the stove. Also, they put coconut milk and chili on the sauce. I understand that part because the chef is from the Bicol region. They are known for using coconut milk and hot chili pepper in their dishes. Despite the difference in our adobo preparation, I still was happy to have seen a Filipino dish on American television.

I photographed my television to get the stills of that show!

Here's Martha and the guest chef.

Chicken is cut into pieces.

Here's how coconut milk is extracted the traditional way. We used to own a similar grater. I once tried to use it. It's pretty hard. I was still a child when I tried it so I guess I'll never know if it was really hard. Nowadays, we can buy freshly grated coconut meat from the market. They now have a machine that can grate coconut meat in seconds.

Chicken is marinated in soy sauce, vinegar, water sugar, salt, pepper and bay leaf.

The chicken is cooked together with the marinade.

This is final product! For presentation, the adobo is placed on a banana leaf.

Monday, September 11, 2006

Mango Pudding

I got this mango pudding recipe from a friend a few months back but I never had the time to try it out. I had a day off from work last Thursday so I had the opportunity to try the recipe.

Ingredients:
1/2 cup water plus 1 + 3/4 cups boiling water
2 tablespoons unflavored gelatin (2 envelopes)
1 1/4 cups sugar
2 mangoes
1 cup half-and-half
Fruit for garnishes, such as kiwi, grapes, or tangerine segments

Procedure:
Put the 1/2 cup water in a large bowl. Sprinkle the gelatin over the water and let it stand for 5 minutes, or until softened.

Add the boiling water, and stir to dissolve the gelatin; then immediately stir in the sugar. Set aside.
Peel the mangoes and cut the flesh off the pits. Reserve half of one mango for garnish, and cut the remaining ma go into chunks, and then process it in a food processor to make a smooth puree. You should have about 2 cups pureed mango.

Stir the puree into the gelatin mixture, and then stir in the half-and-half. Divide the mixture among 8 individual bowls and refrigerate it for 3 hours, or until set. Top the pudding with sliced mango or other fruit. Serve with evaporated milk or half-and-half.


There were three things that I ignored- the part where I have to pour the mixture into eight ramekins, the part where I have to wait until the mixture is set and the garnish. I placed the mixture into an 8"x12" rectangular dish instead of the ramekins. After 3 hours, the mixture was still in liquid form. I was expecting it to harden like gelatin. So, instead of waiting for it to harden, I placed the dish in the freezer. The following day, we have mango sorbet! It was still yummy! I omitted the garnish because I have no more fresh mangoes.

Labels: , ,

Monday, September 04, 2006

Basic Photo Corrections using Photoshop

Photoshop is a very useful image enhancement tool. Amateur photographers like me can easily master basic tricks to correct minor imperfections in a photograph. Below are simple photo improvement techniques I often use using Photoshop.

1. Crop. Cropping a photograph simply means cutting off portions of the photo. This is to put emphasis on a particular subject or simply trimming off unnecessary blank spaces or unwanted areas. How do we do this? I have a sample photograph below. First, examine the photograph. Decide which portion you need to trim off. The glare of the window is distracting to me so let us trim off that portion by clicking the Crop Tool pointed by the red arrow. Drag the mouse to create a box to create the area to retain after cropping. Once you have decided on the image you wanted, enter to crop.


2. Healing Brush. Healing brush is a helpful tool which can correct blemishes, pimples and other imperfections in a a photgraph. It works by copying a "clean" portion of the photograph and overlapping the problem spot with the clean copy. To do this, examine the photograph. Click on healing brush. Press AlT+Click to define a source. This is the clean area of the photograph to be copied. Then, click over the area to correct. Several clicks may be need until the right corrections are finally applied.


3. Curves. Curves is a very powerful tool. Photographs can be corrected by mastering only this tool. In my case, I often use this to correct dark pictures. Click on Image>Adjustments>Curves. Curves will adjust the bright and dark areas in the photograph. Click on a point in the line. Adjust up and down to get the right adjustment. Try on other points until the correction is right. See the adjustments made below.


4. Brightness and Contrast. Photoshop allows image adjustments on its brightness and contrast. The tool is simple yet it creates a huge improvement in the photograph. The brightness control regulates the brightness of the pixel while contrast regulates the difference between dark and light areas. To do this, simple click on Image> Adjustments> Brightness and Contrast. Adjust the levels to you desired output.


6. Sharpen. There are images that are blurry and would be further improved by sharpening. To do this click on Filter> Sharpen. You have the choice to do Sharpen, Sharpen Edges, Sharpen More and Unsharp Mask. I often use the first three but I was told that the unsharp mask gives a better output. I have not learned that part yet. Below is what sharpening does to a photograph. It adds more detail to a photograph. The grains, lines and texture of the flower are now visible. Personally, I prefer the unsharpened one.


Like any other tool, use the tips above at your own discretion. Using these tips can either improve or worsen the image that you are trying to correct. Be sure to have back-ups in case you accidentally ruin the image.