Basic Photo Corrections using Photoshop
Photoshop is a very useful image enhancement tool. Amateur photographers like me can easily master basic tricks to correct minor imperfections in a photograph. Below are simple photo improvement techniques I often use using Photoshop.
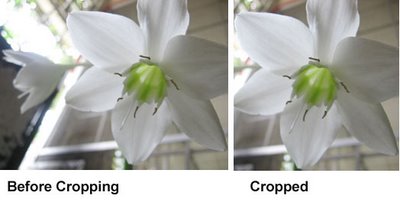
1. Crop. Cropping a photograph simply means cutting off portions of the photo. This is to put emphasis on a particular subject or simply trimming off unnecessary blank spaces or unwanted areas. How do we do this? I have a sample photograph below. First, examine the photograph. Decide which portion you need to trim off. The glare of the window is distracting to me so let us trim off that portion by clicking the Crop Tool pointed by the red arrow. Drag the mouse to create a box to create the area to retain after cropping. Once you have decided on the image you wanted, enter to crop.
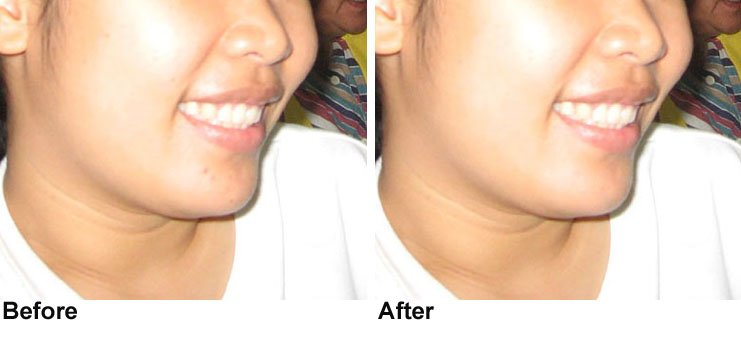
2. Healing Brush. Healing brush is a helpful tool which can correct blemishes, pimples and other imperfections in a a photgraph. It works by copying a "clean" portion of the photograph and overlapping the problem spot with the clean copy. To do this, examine the photograph. Click on healing brush. Press AlT+Click to define a source. This is the clean area of the photograph to be copied. Then, click over the area to correct. Several clicks may be need until the right corrections are finally applied.

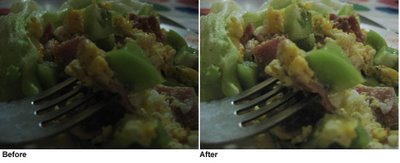
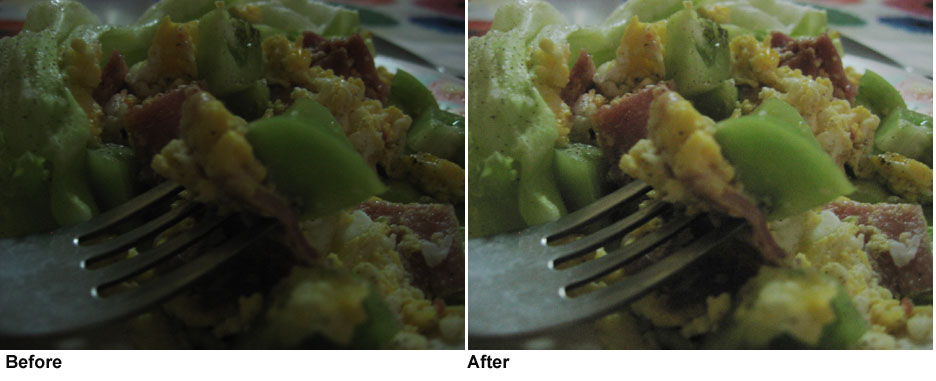
3. Curves. Curves is a very powerful tool. Photographs can be corrected by mastering only this tool. In my case, I often use this to correct dark pictures. Click on Image>Adjustments>Curves. Curves will adjust the bright and dark areas in the photograph. Click on a point in the line. Adjust up and down to get the right adjustment. Try on other points until the correction is right. See the adjustments made below.
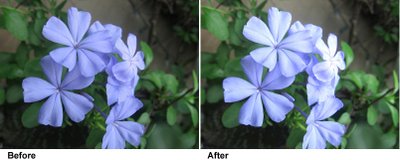
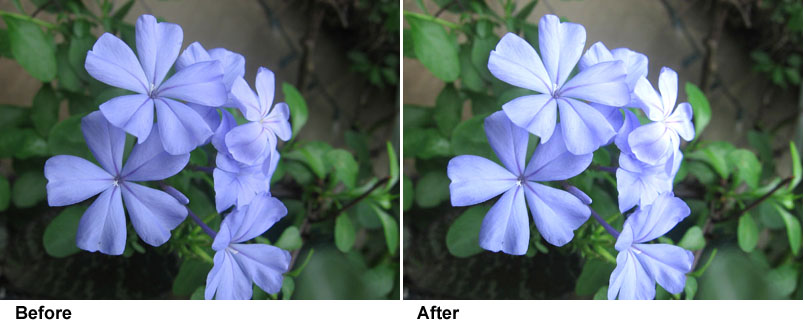
4. Brightness and Contrast. Photoshop allows image adjustments on its brightness and contrast. The tool is simple yet it creates a huge improvement in the photograph. The brightness control regulates the brightness of the pixel while contrast regulates the difference between dark and light areas. To do this, simple click on Image> Adjustments> Brightness and Contrast. Adjust the levels to you desired output.
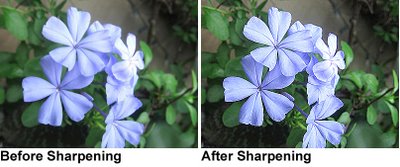
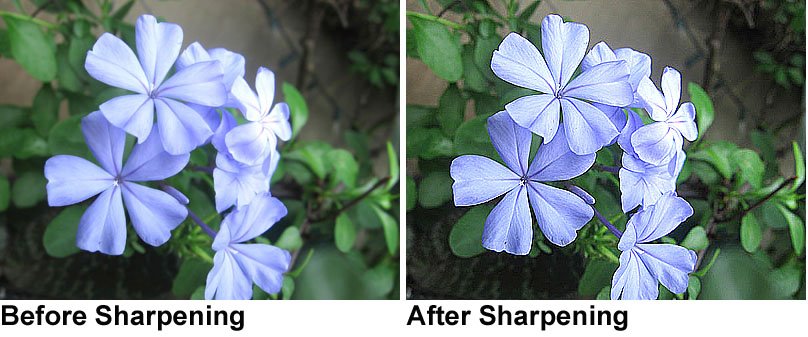
6. Sharpen. There are images that are blurry and would be further improved by sharpening. To do this click on Filter> Sharpen. You have the choice to do Sharpen, Sharpen Edges, Sharpen More and Unsharp Mask. I often use the first three but I was told that the unsharp mask gives a better output. I have not learned that part yet. Below is what sharpening does to a photograph. It adds more detail to a photograph. The grains, lines and texture of the flower are now visible. Personally, I prefer the unsharpened one.
Like any other tool, use the tips above at your own discretion. Using these tips can either improve or worsen the image that you are trying to correct. Be sure to have back-ups in case you accidentally ruin the image.
1. Crop. Cropping a photograph simply means cutting off portions of the photo. This is to put emphasis on a particular subject or simply trimming off unnecessary blank spaces or unwanted areas. How do we do this? I have a sample photograph below. First, examine the photograph. Decide which portion you need to trim off. The glare of the window is distracting to me so let us trim off that portion by clicking the Crop Tool pointed by the red arrow. Drag the mouse to create a box to create the area to retain after cropping. Once you have decided on the image you wanted, enter to crop.

2. Healing Brush. Healing brush is a helpful tool which can correct blemishes, pimples and other imperfections in a a photgraph. It works by copying a "clean" portion of the photograph and overlapping the problem spot with the clean copy. To do this, examine the photograph. Click on healing brush. Press AlT+Click to define a source. This is the clean area of the photograph to be copied. Then, click over the area to correct. Several clicks may be need until the right corrections are finally applied.
3. Curves. Curves is a very powerful tool. Photographs can be corrected by mastering only this tool. In my case, I often use this to correct dark pictures. Click on Image>Adjustments>Curves. Curves will adjust the bright and dark areas in the photograph. Click on a point in the line. Adjust up and down to get the right adjustment. Try on other points until the correction is right. See the adjustments made below.
4. Brightness and Contrast. Photoshop allows image adjustments on its brightness and contrast. The tool is simple yet it creates a huge improvement in the photograph. The brightness control regulates the brightness of the pixel while contrast regulates the difference between dark and light areas. To do this, simple click on Image> Adjustments> Brightness and Contrast. Adjust the levels to you desired output.
6. Sharpen. There are images that are blurry and would be further improved by sharpening. To do this click on Filter> Sharpen. You have the choice to do Sharpen, Sharpen Edges, Sharpen More and Unsharp Mask. I often use the first three but I was told that the unsharp mask gives a better output. I have not learned that part yet. Below is what sharpening does to a photograph. It adds more detail to a photograph. The grains, lines and texture of the flower are now visible. Personally, I prefer the unsharpened one.
Like any other tool, use the tips above at your own discretion. Using these tips can either improve or worsen the image that you are trying to correct. Be sure to have back-ups in case you accidentally ruin the image.
posted by SiKat at 5:03 PM
![]()
![]()


0 Comments:
Post a Comment
<< Home